- About Us

- Our Services
- Your Industry
- Resources
- News & Blog

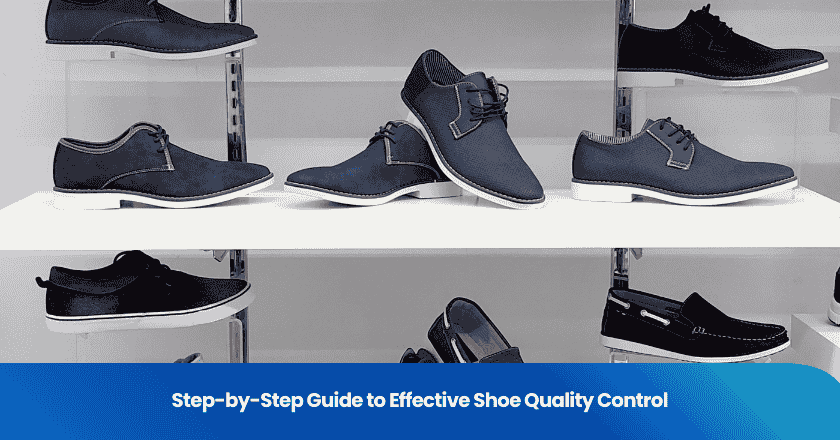
Imagine you receive a shipment and discover several products with defects. You might wonder what is quality inspection and how you can prevent such issues. Quality inspection involves a series of steps that help you ensure your products meet set standards. A systematic approach to quality inspection leads to fewer defects and greater consistency.
By following a clear process, you can reduce errors and maintain high product standards.
What Is Quality Inspection
Definition and Purpose
When you ask what is quality inspection, you seek a process that verifies whether products meet established standards. Quality inspection in manufacturing involves systematic checks at different stages of production. You use product inspection to catch defects, validate processes, and confirm compliance with regulations. Quality assurance inspection ensures that every item aligns with customer expectations and industry requirements.
You can see the primary objectives of quality inspection in manufacturing in the table below:
| Objective | Description |
|---|---|
| Defect detection | Catch nonconformities before they reach customers. |
| Process validation | Confirm that production steps yield parts within tolerance. |
| Compliance verification | Ensure adherence to industry regulations (e.g., ISO 9001). |
You rely on quality assurance inspection to maintain consistency and prevent costly mistakes. Automated product inspection systems provide real-time defect tracking, allowing you to spot trends and address issues quickly. These systems also integrate root-cause analysis, linking inspection failures to corrective actions and improving overall quality.
Why Quality Inspection Matters
Quality inspection in manufacturing protects your business from financial loss and reputational damage. When you implement quality assurance inspection, you reduce the risk of product recalls and customer complaints. One inspector in the pharmaceutical industry shared,
“Quality inspection systems have saved us from a huge recall which could have bankrupted our company. It’s improved the overall quality on the production floor and reduced complaints and returns from our customers.”
Letting a critical error slip by can lead to significant financial consequences. Errors in labels or packaging may trigger expensive recalls. Quality inspection eliminates the risk of misprints and formatting issues, saving you time and resources. You use product inspection to ensure every item meets specifications before shipment. By following a robust quality assurance inspection process, you build trust with your customers and strengthen your reputation for reliability.
Types of Quality Inspection
Quality inspection involves several stages, each designed to catch issues before products reach your customers. You can use different types of product inspection to ensure quality at every step of the supply chain.
Pre-Production Inspection
You start with pre-production inspection to set the foundation for quality. This process helps you confirm that raw materials and components meet your standards before manufacturing begins. The steps include:
1. Preparation: Define your inspection criteria, sample sizes, and testing protocols.
2. Arrival & Setup: Inspectors arrive with the right tools and check equipment calibration.
3. Initial Assessment: Review samples visually and dimensionally, noting any discrepancies.
4. Testing & Verification: Perform functional and material tests, along with safety checks.
5. Reporting & Feedback: Compile results into detailed reports for your team.
6. Follow-up: Schedule re-inspections if you find issues.
By following these steps, you prevent defects from entering the production line.
During Production Inspection
During production inspection takes place when 10-15% of manufacturing is complete. You use this product inspection to spot problems early, such as incorrect materials or assembly errors. This approach lets you:
- Detect defects before they affect the entire batch.
- Keep your production schedule on track by addressing issues quickly.
- Receive actionable reports that help you make informed decisions.
You reduce the risk of costly delays and maintain consistent quality.
Pre-Shipment Inspection
Pre-shipment inspection happens after production finishes but before shipping. You use this product inspection to ensure that all goods meet your requirements. The process includes:
| Step | Description |
|---|---|
| Verify Factory Readiness | Confirm all goods and documents are ready for inspection. |
| Sampling | Select batches that represent the shipment accurately. |
| Product Quality Testing | Test products for function and special requirements. |
| Visual Inspection | Check for visible defects and confirm quality standards. |
| Physical Requirements | Ensure products meet size and material specifications. |
| Packaging and Label Verification | Confirm packaging and labels meet regulations and customer needs. |
| Barcode Verification | Check barcodes for accuracy. |
| Documentation | Create detailed inspection reports. |
This step ensures you only ship products that meet your standards.
Container Loading Inspection
Container loading inspection protects your goods during shipping. You use this quality inspection to:
- Prevent transit damage by checking loading practices.
- Reduce shipping errors by verifying product types and quantities.
- Ensure container integrity by inspecting for rust, leaks, and cleanliness.
- Prevent theft and tampering by checking seal integrity.
- Build trust with buyers by providing transparency in the shipping process.
You safeguard your products and reputation by making this the final checkpoint before delivery.
Quality Inspection Process Steps
A successful quality inspection process follows a clear sequence. You begin with preparation, move through sampling and checks, and finish with documentation and defect classification. Each step ensures your products meet both your standards and your customers' expectations.
Preparation and Standards
You set the foundation for effective quality inspection by defining clear, measurable standards. Start by aligning your inspection criteria with customer requirements and regulatory guidelines. This step ensures everyone understands what constitutes an acceptable product.
Tip: Use detailed checklists and reference samples to communicate expectations to your inspection team.
The process typically follows this sequence:
| Step Number | Step Name | Description |
|---|---|---|
| 1 | Pre-Production Inspection (PPI) | Focuses on raw materials and initial setup before mass production begins. |
| 2 | During Production Inspection (DUPRO) | Takes place when 20-80% of production is complete, identifying defects while production is ongoing. |
| 3 | Pre-Shipment Inspection (PSI) | Final check before shipment to ensure products meet specifications. |
| 4 | Container Loading Inspection (CLI) | Verifies correct loading of products and their condition during transit. |
You ensure that each stage of the quality inspection process addresses specific risks and requirements. This approach helps you prevent issues before they escalate.
Sampling and Specifications
You rarely inspect every single item in a large batch. Instead, you use sampling methods to select representative products for inspection. The choice of sampling method depends on your goals and the nature of your products.
| Sampling Method | Description | Purpose in Quality Inspection |
|---|---|---|
| Random Sampling | Items are selected randomly from the population. | Ensures unbiased representation of the population. |
| Stratified Sampling | Population is divided into subgroups before selection. | Ensures representation from all subgroups. |
| Systematic Sampling | Items are selected at fixed intervals throughout the population. | Provides a structured approach to selection. |
You determine sample size based on population size, desired confidence level, and acceptable error rate. Statistical analysis tools help you interpret results accurately, providing confidence intervals and validating your findings. This ensures your conclusions apply to the entire batch, not just the sample.
Visual and Functional Checks
You perform both visual and functional checks during product inspection. Visual checks help you spot surface defects, incorrect labeling, or packaging errors. Functional checks confirm that products operate as intended.
Here are some common inspection types you might use:
| Inspection Type | Description |
|---|---|
| Direct Visual Inspection | Examines products with the naked eye for surface defects. |
| Microscopic Inspection | Uses microscopes for detailed examination of small components. |
| Automated Visual Inspection | Utilizes machine vision systems and AI for defect detection on production lines. |
| Illuminated Visual Inspection | Enhances visibility during inspections with specialized lighting. |
| Thermal Imaging Inspection | Detects temperature variations indicating subsurface defects using infrared cameras. |
| Functional Testing | Confirms that products meet performance and safety requirements. |
Automated visual inspection systems provide consistent quality control and can detect anomalies that human inspectors might miss. Automation reduces the impact of fatigue and distraction, leading to more reliable results. You can accelerate approvals and reduce delays by integrating digital tools into your quality control procedures.
Documentation and Reporting
You document every step of the quality inspection process. Accurate records help you track trends, identify recurring issues, and demonstrate compliance with regulations. Your reports should include:
- Inspection date and location
- Inspector’s name
- Sampling method and size
- Product specifications and test results
- List of defects found, with severity ratings
- Corrective actions taken
Note: Digital documentation tools can reduce inspection times by 50% and automatically detect errors at any stage.
Clear reporting supports data-driven decision-making and continuous improvement in your quality control system.
Defect Classification
You classify defects to prioritize corrective actions and communicate severity to stakeholders. Defect classification helps you focus on the most critical issues first.
| Severity Level | Description |
|---|---|
| Critical Severity | Indicates a system crash or complete failure of core functionality; typically halts testing immediately. |
| High Severity | Major feature is broken, but some parts of the system remain functional. |
| Medium Severity | Affects non-critical functionality; workarounds are possible. |
| Low Severity | Minor issues like UI misalignment or text errors that don’t impact operations. |
| Cosmetic Severity | Very minor issues, often aesthetic, not affecting performance. |
| Environment-Related Severity | Arises due to test environment conflicts during QA functional testing or system configurations. |
You evaluate the impact on end-user operations, check for functional disruption, and analyze customer experience. You also estimate potential business impact and collaborate with your team to assign severity levels. This structured approach ensures you address the most significant problems quickly and maintain high product standards.
By following these quality inspection steps, you create a robust framework for product inspection and quality control. You minimize risk, improve efficiency, and deliver products that meet or exceed expectations.
Quality Control Checklist and Examples
Creating a Quality Control Checklist
You build a strong quality control checklist by focusing on the critical elements that impact product inspection. Start by listing physical requirements, packaging standards, labeling accuracy, and functional testing procedures. For apparel manufacturing, you include dimensions, tolerances, materials, workmanship, color, garment weight, and markings. Packaging requirements cover weight, dimensions, boxing material, and carton labeling. On-site tests and checks involve size fitting, color shading, colorfastness, and fabric weight. The table below outlines essential categories and elements:
| Category | Elements Included |
|---|---|
| Product Requirements | Dimensions, tolerances, materials, workmanship, color, garment weight, markings, labeling |
| Packaging Requirements | Packaging weight, dimensions, boxing material, carton labeling |
| On-site Tests and Checks | Size fitting, color shading, colorfastness, fabric weight |
Tip: You improve your quality inspection by updating your inspection checklist regularly to reflect new standards and customer feedback.
Sample Checklist Items
You ensure thorough product inspection by including specific items in your quality control checklist. For food production, you verify raw materials, control allergens, maintain documentation, enforce hygiene, and train employees. You also check production methods, packaging quality, and regulatory compliance. Here are practical checklist items:
- Raw material verification
- Allergen control protocols
- Documentation and traceability
- Hygiene and sanitation control
- Employee training and hygiene
- Continuous improvement tracking
- Production methods evaluation
- Packaging quality assurance
- Regulatory compliance checks
- Finished goods quality control
You use these items to catch issues early and maintain high standards throughout your quality control process.
Real-World Scenarios
You see the impact of a quality control checklist in real-world settings. When you implement a structured process, you catch minor mistakes before they become major problems. For example, in manufacturing, checklists help you track inspection criteria and quickly identify defects. You prevent contamination and improve efficiency. In customer service, your inspection checklist ensures only high-quality products reach buyers, boosting satisfaction and repeat business. The table below highlights successful scenarios:
| Scenario | Evidence of Success |
|---|---|
| Manufacturing Process | Checklists track criteria, prevent contamination, and improve efficiency |
| Customer Satisfaction | Inspection checklists prevent subpar products, leading to repeat business |
You avoid issues like loose hose clamps, forgotten fasteners, unplugged sensors, and missed diagnoses by using a comprehensive quality control checklist. This approach strengthens your product inspection and supports continuous improvement.
Best Practices for Quality Inspection
Common Mistakes to Avoid
You strengthen your quality control process by recognizing and addressing frequent errors. Many teams overlook preparation, which leads to missed expectations and critical issues. Inspectors who lack proper training may fail to spot important defects, compromising reliability. Subjectivity often creeps in when you rely on personal judgment, causing variability and inaccurate results. Inconsistent inspection methods create confusion and risk the release of subpar products. Overreliance on technology can also result in missed defects, as machines cannot fully replace human insight.
- Lack of preparation can result in overlooked defects and production delays.
- Insufficient training reduces the reliability of inspections.
- Subjectivity introduces variability and affects accuracy.
- Inconsistency leads to unreliable results and confusion.
- Overreliance on technology may cause potential oversights.
Tip: Regularly review your inspection process to identify and eliminate these mistakes.
Tips for Consistency
You achieve consistent quality control by following proven strategies. Start by setting clear inspection standards to guide decision-making. Use appropriate tools and equipment to enhance inspection effectiveness. Train inspectors thoroughly so they understand both standards and methods. Monitor production processes and adjust based on inspection data to minimize defects. Automate tasks where possible to speed up inspections and improve accuracy. Communicate findings quickly to enable immediate corrective actions. Track performance over time to identify trends and measure improvements.
1. Set clear inspection standards for objectivity.
2. Use the right tools and equipment.
3. Train inspectors thoroughly.
4. Monitor and adjust production processes using inspection data.
5. Automate tasks to improve speed and accuracy.
6. Communicate findings promptly.
7. Track performance to measure effectiveness.
Structured checklists play a vital role in quality control solutions. They ensure every task is performed uniformly, reduce errors, and streamline operations. Checklists clarify responsibilities, support data tracking, and help meet compliance requirements. You also use them as training tools for new employees, outlining expected tasks.
Companies measure the return on investment in quality control solutions by tracking escaped defects and comparing resolution times for issues found before and after release. This approach highlights cost savings and improved product quality.
You can strengthen your quality inspection process by following these essential steps:
8. Select a product sample.
9. Review design and quality specifications.
10. Use digital checklists for inspections.
11. Perform visual checks.
12. Document and report findings.
13. Take corrective and preventive actions.
Regular inspections show your commitment to delivering defect-free products and building trust. When you apply these best practices, you reduce costly recalls and improve operational effectiveness. Make quality your priority to achieve long-term success.
Related Articles

Grow your business with TradeAider Service
Click the button below to directly enter the TradeAider Service System. The simple steps from booking and payment to receiving reports are easy to operate.